This article is to help Portal content creators add a dedicated calendar section under Collection/Solution pages.
Why add an Events Calendar?
- Enhanced visibility: provide your users with easy access to upcoming events related to your Solution / Collection.
- Increased Engagement: if added to the landing page of your Collection/Solution, the calendar serves as a reference point for upcoming events, encouraging frequent visits.
Steps to create an Events Calendar
Step 1: Sign into the Portal and navigate to the Collection/Solution where you wish to add a calendar (either in a new page or in an already existing one).
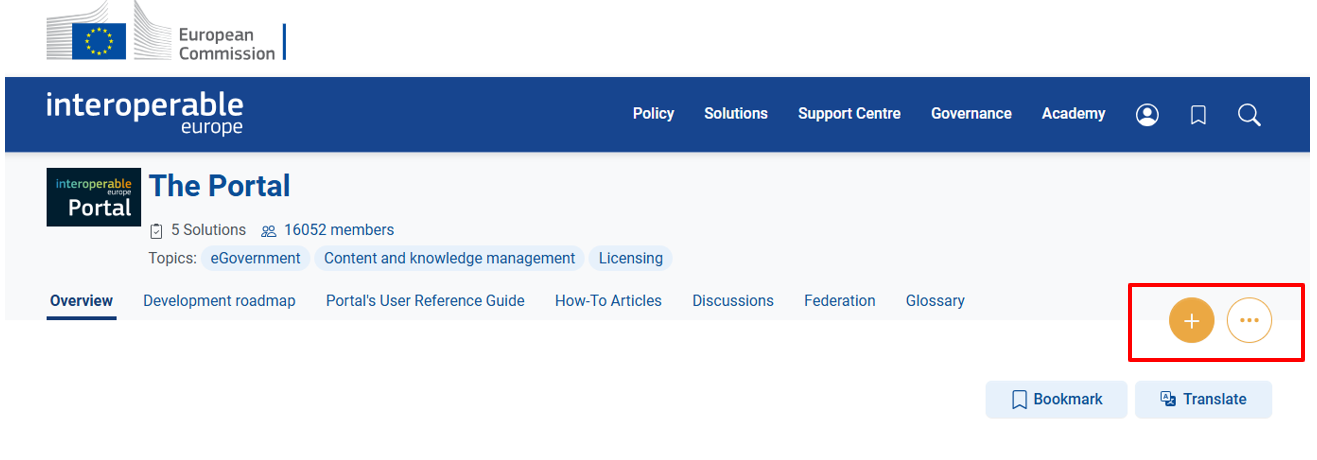
Step 2:To create new content, click on the ''plus'' icon and select the type of item you wish. To edit already published content, click on the ''three dots'' icon and select “Edit”. Both icons are available at the top right of the page.
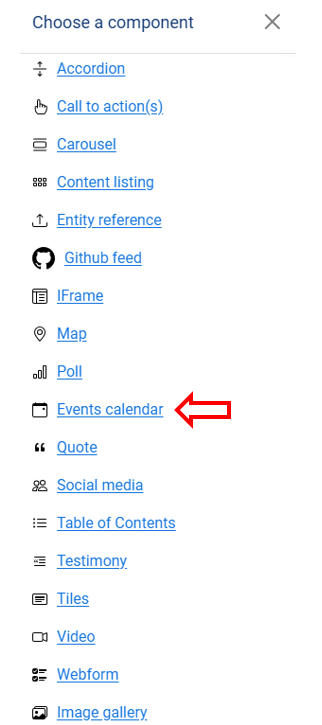
Step 3: Once in edit mode, add or create a layout and then insert the ''Events calendar" component by clicking on the “+” icon that appears when you hover over the layout.

Step 4: Through the popup window you'll be able to choose between the four available calendar options.
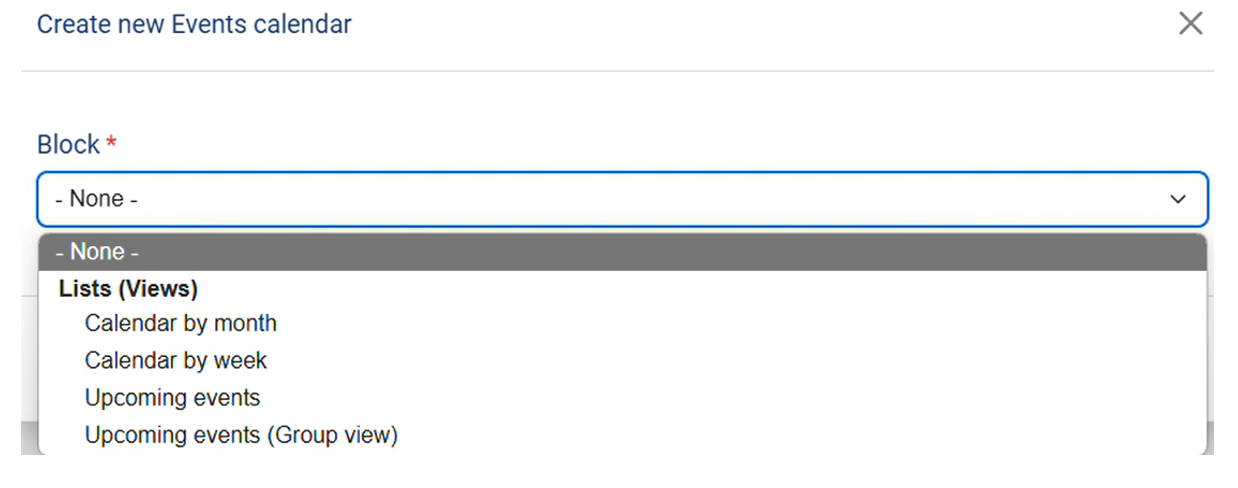
Step 5: To showcase all events published on the platform, select ‘Calendar by month’, ‘Calendar by week’, or ‘Upcoming events.’

Step 6: To display only events related to your Solution/Collection, Select ‘Upcoming events (group view).’
Step 7: Choose the one that best fits your content and save the changes by publishing the page!
Do you have any question?